Day 28: Configuring Jenkins Master with Jenkins Node

DevOps Enthusiast, Learning Linux
This is the Day 28 of the #90DaysofDevOps in which I am configuring the Jenkins Master server with Jenkins Node. Check out my previous blogs on Jenkins Declarative Pipeline, how to make Jenkinsfile, Docker, and Linux.
So, the big question that comes to your mind is What is the need to create another server for Jenkins Node and configure it with Jenkins Master?
While installing Jenkins, the Jenkins controller will also be installed in the Jenkins Master server. The Jenkins controller manages to schedule jobs, and build the jobs in simple words it is the main server of Jenkins. So, as a DevOps Engineer, it is not the best practice to put all the workloads on the Master server like creating jobs and building the Jobs. To avoid the workloads we create Jenkins Node i.e another server in which Jenkins will be installed and configure the Jenkins Node with the Jenkins Master so that Jenkins Jobs will be built on the Jenkins Node.
Configuring Jenkins Master to Jenkins Node
Steps On Jenkins Master:
Create Ubuntu 18.04 AWS EC2 Instance for Jenkins_Master.
After creating the instance connect with the instance.
Install Jenkins on the server with the help of installation documentation.

- Now update the password of the Jenkins user. (my Jenkins user password is Jenkins)

- Make the Jenkins user a sudoer for giving the root privilege. Execute
$ sudo visudo
It will open the nano editor, now scroll to the user privilege section and write
jenkins ALL=(ALL) NOPASSWD:ALL after this press Ctrl+x and then press y, exactly like this in the image.

- Now open the configuration file
/etc/ssh/sshd_configand change the password authentication to yes. After doing this press esc button and type :wq! to save the changes.
sudo vi /etc/ssh/sshd_config

- Now restart the ssh service.
sudo service ssh restart
Steps on Jenkins Node:
Do the same steps but don't install Jenkins on Node.
Create the new Ubuntu 18.04 AWS EC2 Instance for Jenkins_Node.
Install open-jdk-11 on Jenkins_Node
$ sudo apt-get install openjdk-11-jdk
- Now add the Jenkins user and create the password of the Jenkins user. ( I am giving the same password as the Jenkins user), after typing the password press enter till (Y/N).
$ sudo visudo adduser jenkins

- Now make the Jenkins user a sudoer.
$ sudo visudo

Press Ctrl+x and then press y.
- Now open the configuration file
/etc/ssh/sshd_configand change the password authentication to yes.
$ sudo vi /etc/ssh/sshd_config

- Now restart the service.
$ sudo service ssh restart
Steps for executing Jobs on the Node Side:
- Now go to Jenkins and open Manage Jenkins.

- Under Manage Jenkins, go to Manage Nodes and Clouds and create the New Node.
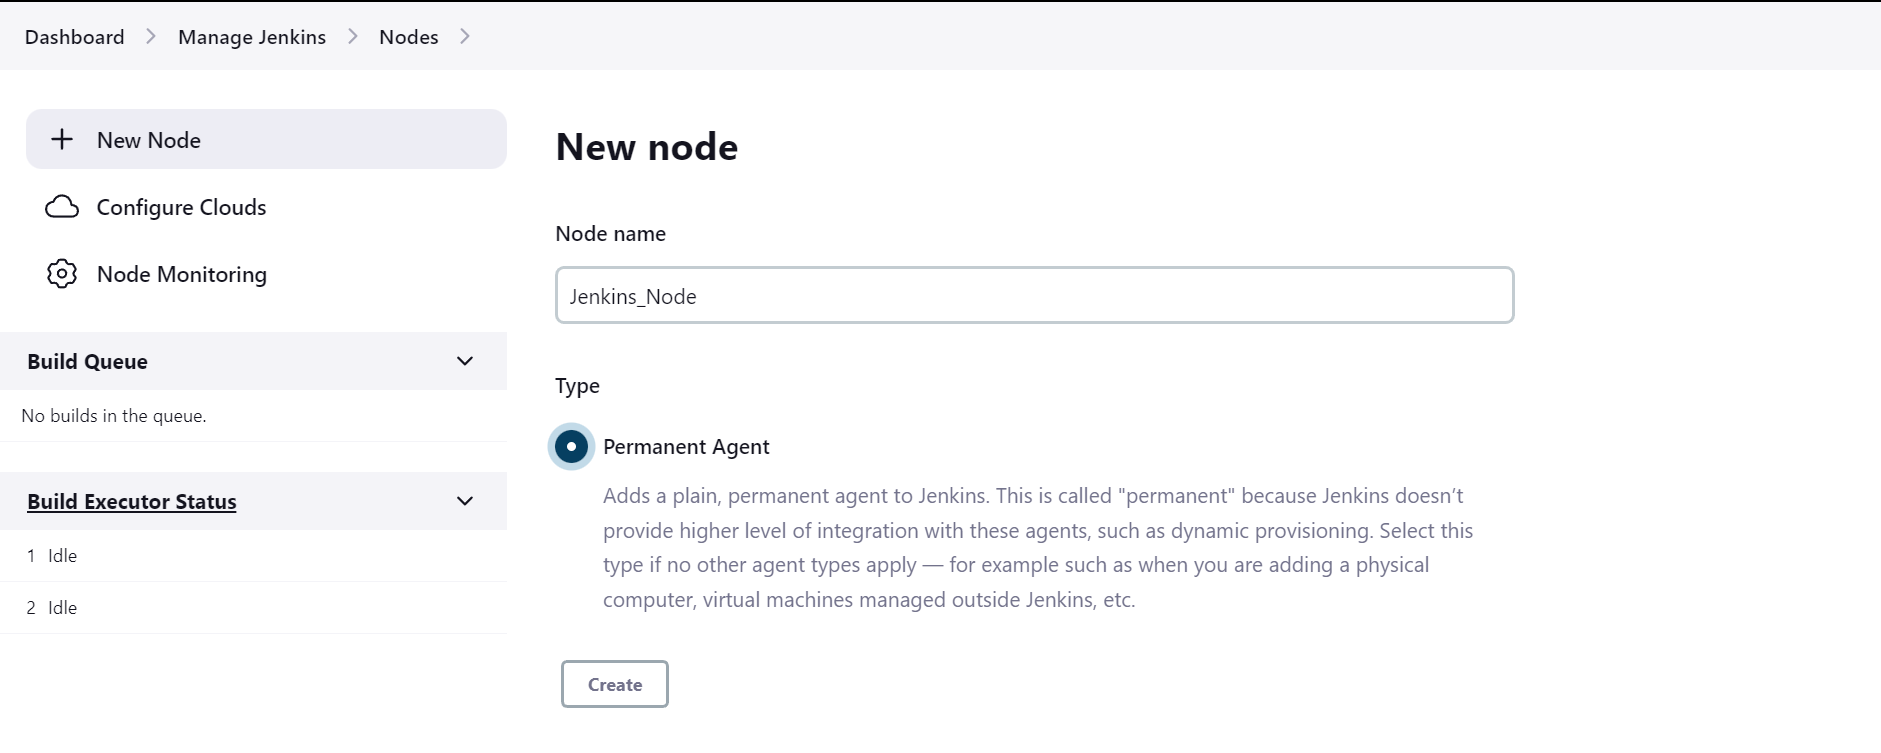
- It will open the configure page of Node. Fill the details under,
Number of Executors: 2
Remote Root Directory: Login to your Jenkins_Node Instance, go to Jenkins user type cd, and then type pwd.

Your remote root directory will be /home/jenkins .
Under the Launch method select Launch Agents via SSH.
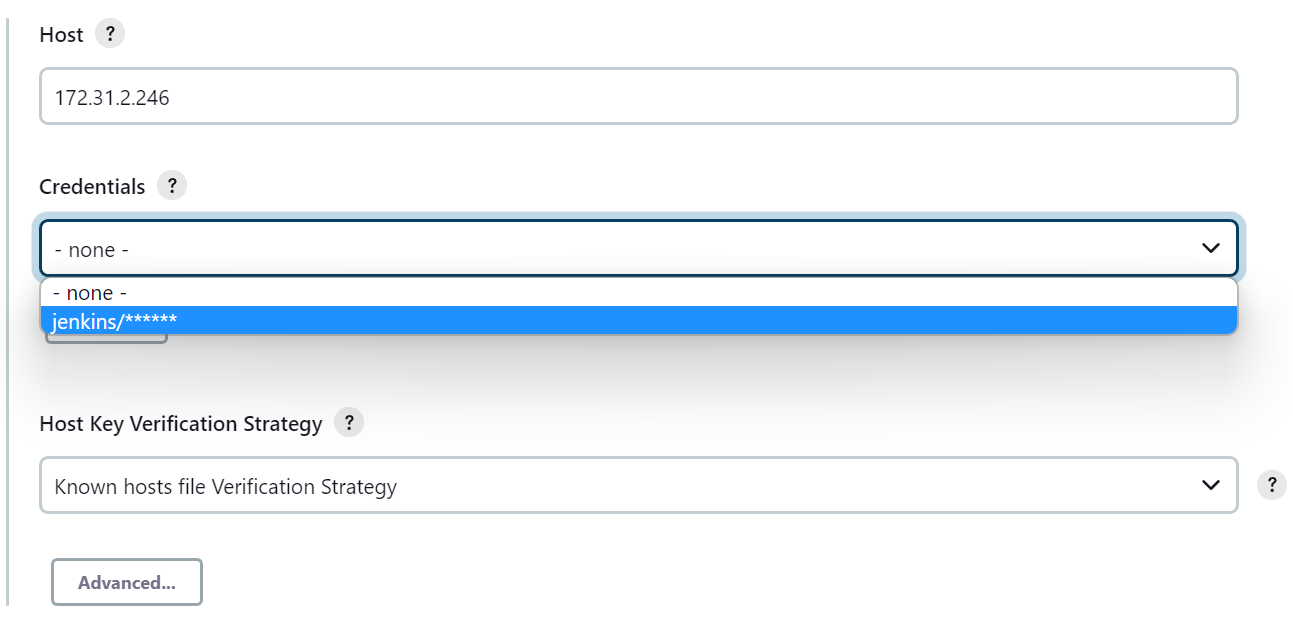
Under Host give the Jenkins Node instance public IP.
Then add credentials by clicking on ADD, it will open the credentials provider page, under this give the username (jenkins), and in password give the user password that you had created in the Jenkins Node instance, and click on Add. After this select the credentials you will see your added credentials select the given credentials.
Now Add the Agent and Launch it. Your agent will be successfully connected and it will be online.


Under S if the desktop icon is not showing cross sign then the Jenkins Node has been successfully connected.
If you want to verify whether the Jenkins Node is communicating or not.
Connect with Jenkins Master. Switch it to the Jenkins user
sudo su jenkins, then for connecting with Jenkins Node executessh <Private IP of Node>and give the password of the Jenkins user that you had given in the Jenkins Node.

You can see that the Jenkins Node has been successfully connected with the Jenkins Master.
Let's build the Job on the Node Side.
Create a new Job i.e To_Do_App.
Give the GitHub Project Link under GitHub Project, and under build triggers select GitHub hook trigger for GITScm polling (by WebHook).
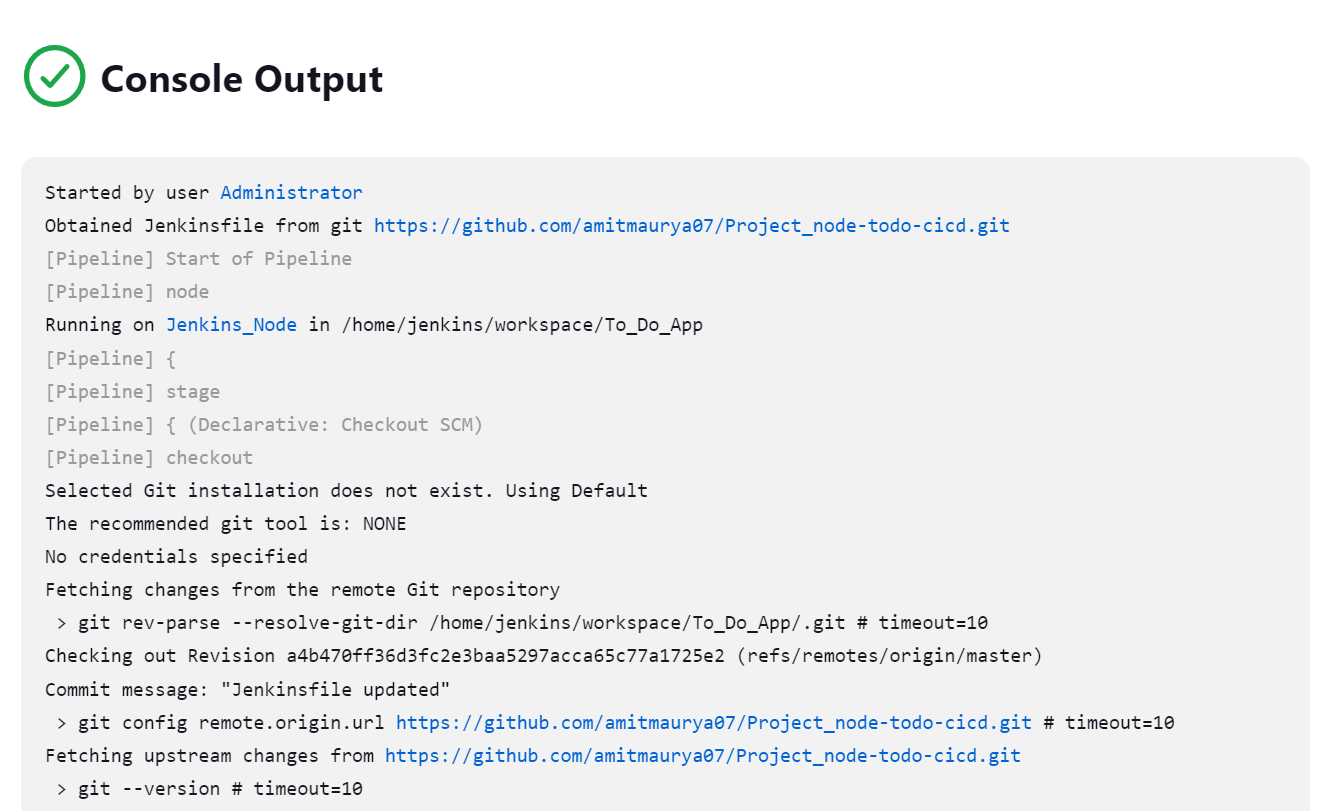
Under Definition select Pipeline Script from SCM, then give the GitHub Project link and check on which branch Jenkinsfile is located only give that branch name.
You can see that the job has been successfully built on Jenkins_Node.
And you can check also that the container is running on the Jenkins_Node.

You can access this container by copying the public IP with port number 8000.

If you want to learn about Jenkinsfile in detail you can checkout my previous blog (Day 27).
That's it for the Day 28 Task of the #90DaysofDevOps challenge in which we learned about how to configure the Jenkins Master with Jenkins Node and how to build the Jenkins Job on the Jenkins_Node machine.
Stay Tuned for the next DevOps and Linux upcoming blogs !!
You can connect with me on Twitter (amitmau07)
THANK YOU :)
HAPPY LEARNING :)


