Day 16: Getting Started With Docker

DevOps Enthusiast, Learning Linux
Docker is a platform that provides containerization technology. It packs all the application's code with all its dependencies, frameworks, libraries, etc into a single container in an isolated environment. With the help of Docker, we can create, test, and quickly deploy our application containers into the production environment. Docker is the most popular buzzword around development and it was beneficial for DevOps engineers in the deployment phase.
Difference b/w Virtual Machines and Docker
In Virtual machines, the Guest OS and Host OS are there which puts more load on machines and slows down deploying the application while Docker has only Host OS that becomes faster than virtual machines. As the container is lightweight that provides faster deployment of applications.
In Virtual machines, we cannot share with any other due to compatibility issues because VMs are dependent on the Host OS which becomes difficult for portability while Docker is best for portability because inside the container you'll pack all the applications code dependencies that can become easily portable on any other OS.
In Virtual machines, if some memory is left in an environment that is unused then you cannot reallocate it to another and its memory usage is also very high while in Docker you can easily reallocate the memory and the memory usage is also very low due to single OS.
Docker Components:
There are 4 components of Docker :
Docker Client
Docker Engine (Docker Deamon)
Docker Registry (Docker Hub)
Docker Image
With the help of these 4 components Docker works. When the docker client runs docker run command then it goes to the Docker daemon and finds the local repo of that image that is available on your system or not, if it is not available on your local system then again Docker daemon goes to Docker Hub (where all the applications images are stored) and finds that image then it pulls the docker image to the local repo and then comes back to Docker daemon again then goes to Docker Client. That's how the Docker client gets the image and this is how Docker works.
Remember images, volumes, containers, and networks are stored in /var/lib/docker/
Installation of Docker :
I am using Ubuntu 18.04 for the installation of Docker.
$ sudo -i
$ sudo apt-get update
sudo -i command switches the ubuntu user to the root user.
sudo apt-get update will update all the system's software packages.
$ sudo mkdir -p /etc/apt/keyrings
$ curl -fsSL https://download.docker.com/linux/ubuntu/gpg | sudo gpg --dearmor -o /etc/apt/keyrings/docker.gpg
sudo mkdir -p /etc/apt/keyrings the command will create the nested directory in the /etc i.e. configuration file. (-p is used to create the nested directory)
And the curl command is used for transferring the data and it will add Docker's official GPG Key.
echo \
  "deb [arch=$(dpkg --print-architecture) signed-by=/etc/apt/keyrings/docker.gpg] https://download.docker.com/linux/ubuntu \
  $(lsb_release -cs) stable" | sudo tee /etc/apt/sources.list.d/docker.list > /dev/null
Then again update the system's software packages.
$ sudo apt-get update
$ sudo apt-get install docker-ce docker-ce-cli containerd.io docker-compose-plugin
This command will install the docker latest version. To check whether Docker is installed or not -
$ systemctl status docker
These are all commands of Linux I covered in previous blogs so do check them out.
Docker Commands :
docker runcommand will run the image in the container. This command will run in the foreground means when you press enter by executing this command it will automatically exit out of the container. Don't worry in upcoming blogs we"ll know about docker modes.
docker run hello-world
This command will run the hello-world image and put it into a container.
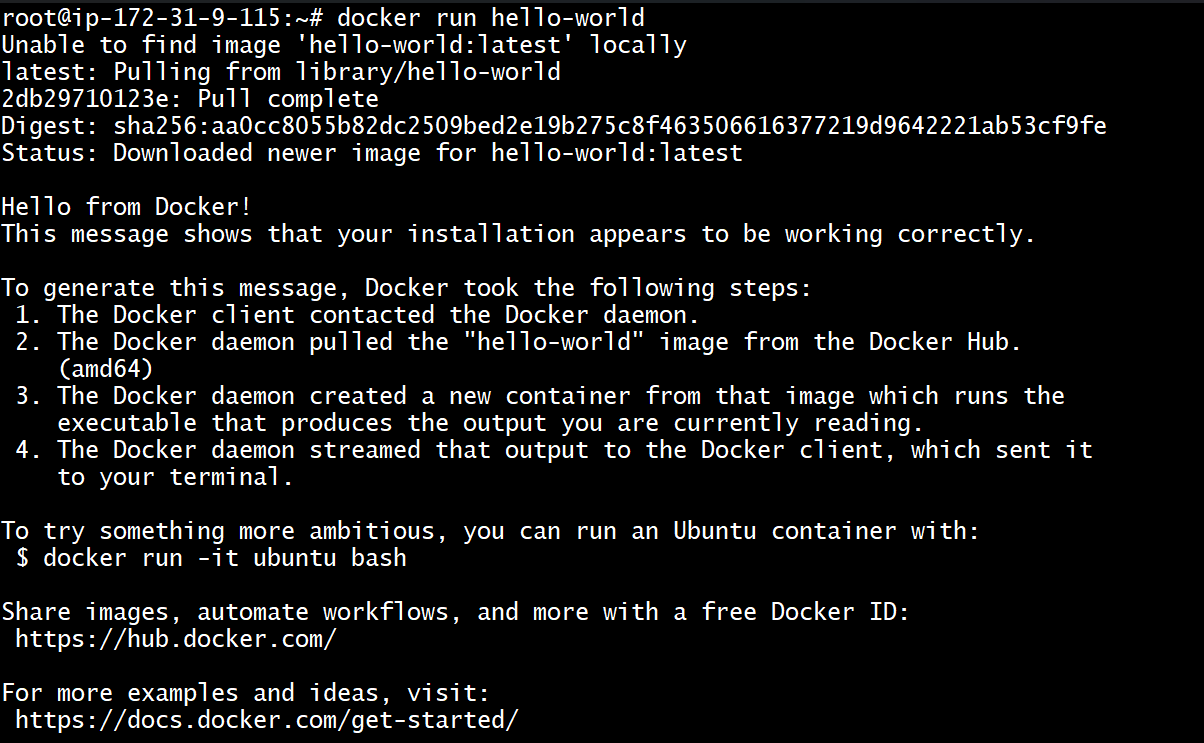
As you can see in the image first docker daemon finds the image locally after not getting that image Docker Daemon goes to the official Docker Hub site and pulls the image and then created the container.
- Command to check whether the image is created or not
$ docker images

You can see the repository/image name and Image ID and its size also.
- To see whether the container is running or not.
$ docker ps -a
$ docker ps
docker ps -a command will show all the running and excited containers with their ID, who has created this image, and the status of the container.
docker ps command will only show running containers.

- Command to get more details about the container, execute
$ docker inspect <Container ID>
This command will show all the minute details about the containers like their drivers, networks, status, memory, and much more.
docker statscommand will show the live data of the running containers means it will show the percentage usage of CPU, Memory, PIDs (Process and Threads), Network interfaces, and block devices. To get out of the live streaming press Ctrl+C.docker topcommand is used to display the running processes inside the container.docker loadcommand is used to load the tar archive of the image.docker savecommand to save an image to a tar archive.docker start/stopcommand is used to start and stop the container.docker rmi -f <Image Name>command is used to delete the images.docker rm -f <Container ID>command is used to delete the containers.docker rmi $ (docker ps -a -q)command is used to delete all the containers.docker rmi $ (docker images -q)command is used to delete all the images.docker ps -a -qcommand will show all container ID only.
That's it for today's task !! I hope from this blog you will learn the docker concepts and why it is used.
Follow me on Hashnode for more Linux and DevOps Blogs !!
Connect with me on Twitter (amitmau07)
THANK YOU !! :)
HAPPY LEARNING !!


